


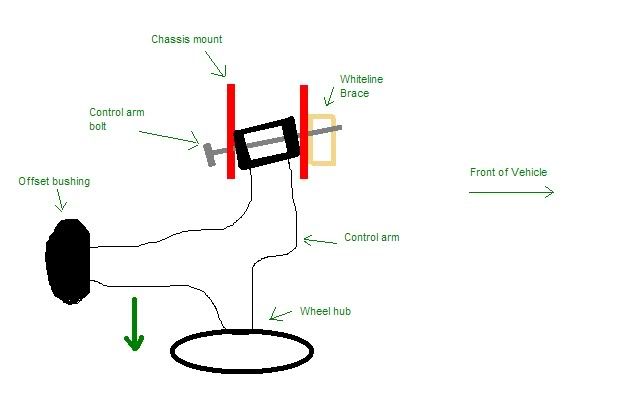
The bushings should not change the whiteline brace, it mounts to the chassis not the control arm.


 Be the first to like this post. Be the first to like this post.

 Be the first to like this post.
") Be the first to like this post.
Be the first to like this post.
 Be the first to like this post.
 Be the first to like this post.
 Be the first to like this post.
Be the first to like this post.
Be the first to like this post.
Be the first to like this post.
Be the first to like this post.
Be the first to like this post.
Be the first to like this post.