Welcome to the SR20 Community Forum - The Dash.
Register
SR20 forum logo

Thread: Another K-sport thread....

+ Reply To Thread
Posts: 1-10 of 25
2011-07-03 19:53:11
#1
Another K-sport thread....
Ok I have spent the last two weekends trying to set these up and its a huge pain. Way too complicated for the low-buck-ness of the setup.

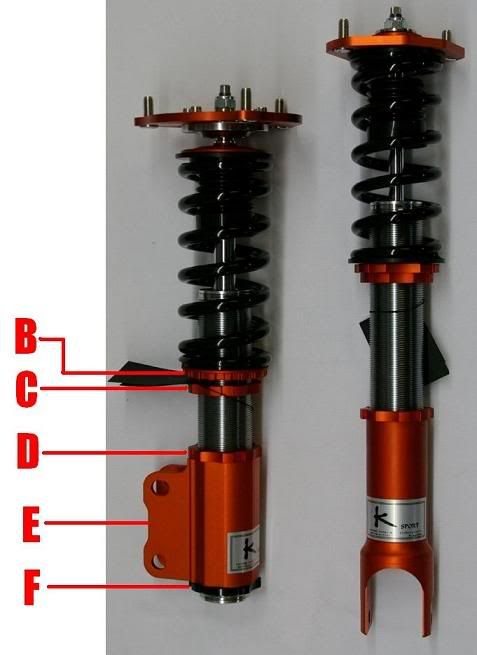
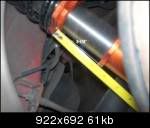
First I was trying to set the ride height with the upper perch like the Ground Control coils I had twice before. That will load the spring and screws up everything. Also it will not raise your car out of the weeds.

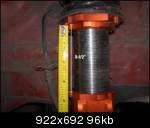
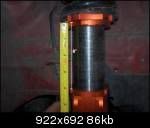
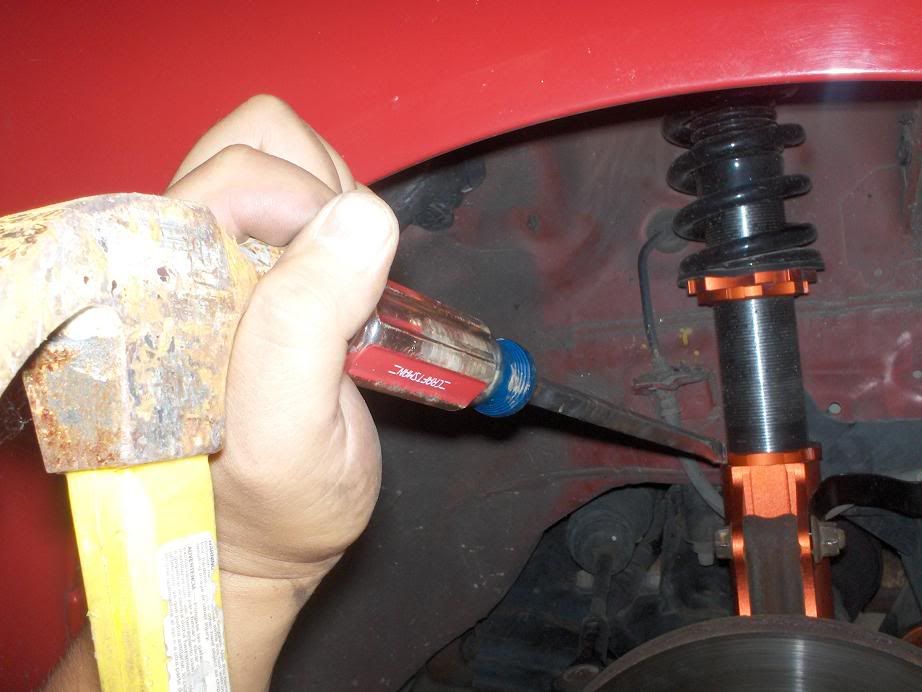
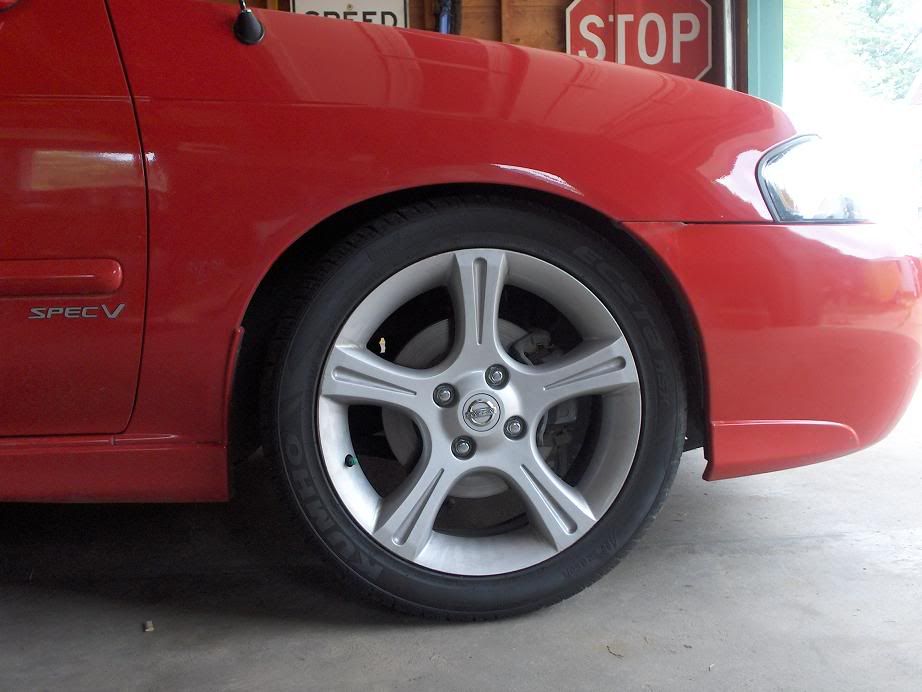
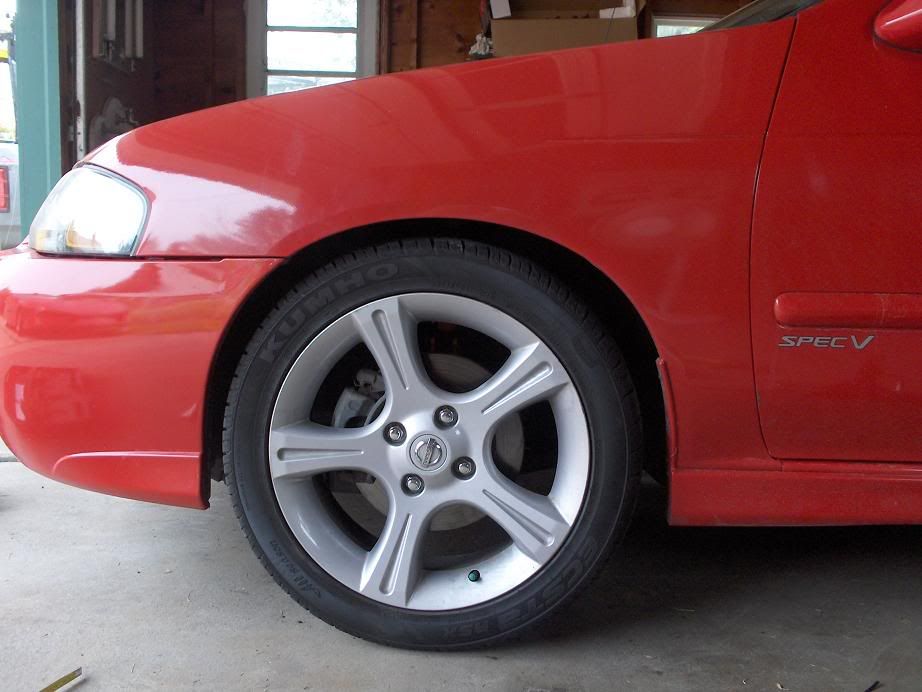
Now I can't get the threaded collar to move in the housings on the fronts. Sprayed some pb blaster in there hope it loosens up. So its basically sitting all wonky because the car is at 23.25-23.75" all around and each corner is different... it sucks. I think the problem is that the threaded collars in the strut/knuckle housings are at different heights so the ride height will never be right without some goofy adjusting.

Some damning evidence from good sources.

http://www.sr20-forum.com/suspension/10208-ksports-coil-overs-2.html

pics of the k-sport suspension - Page 5 - SR20 Forum

Anyway I think most people who have set these up properly haven't posted a whole lot so. If you have K-sports and have them set up at a normal height lemme know what worked. Please
2011-07-03 20:03:07
#2
I have k sports on my b15 and used this how-to
allsentra.com-A Nissan Sentra Forum/Se-r Forum/Spec-V Forum. All Sentra's(B13,B14,B15,B16 and B17 welcome reguardless of motor or type • View topic - How-To: Install Ksports
Originally from Davabran

This is probably one of the easier install, It just takes a little time to get everything right. One person can do this easy, but twomakes it fly.

PARTS (NOTE: just a reference photo)
B. Spring Perch
C. Spring Perch Lock Ring
D. Lower Lock Ring
E. Lower Mount
F. Black Lower Lock Ring


INSTALL
1. For my preload I tightened the spring perch (B) as tight as I could with my hands.
2. Then mark the spring perch (B) with a piece of masking tape. Then use a perch wrench and turn it till the spring perch went around three full times tightening the spring. Then tighten Spring Perch Lock Ring (C)hand tight with both perch wrenches included. Do this to all four coilovers before installing.
3. Install assembly in car, install 3 bolts on top of strut in trunk. (I think 12mm)
4. Adjust height with lower mount(make sure to measure so you can match the other side. I measured from the top of the Spring Perch Lock Ring (C) to the top of the Lower Lock Ring (D). I used 3-1/2” for a couple days then raised them to 4” and I like them where they’re at.
At 3-1/2”
At 4”

5. Install brake line bracket in similar position to stock. Install brake line. Install bottom 2 bolts snug (17mm); you'll torque them down later. You can use a jack to raise the lower control to make it easier to install your camber bolts.
6. Bolt wheel back snug again. Lower your car and check your drop or raise.
7. If you want to raise or lower the car remove bottom two bolts, and raise/lower perch and check again.
8. Once you get your height to where you want it tighten top three bolts. Before you tighten the lower two bolts there is camber adjustment you can pivot the top to the left and right. I just pushed both sides towards the engine as much as I could, then tightened the lower two bolts. Just keep them the symmetrical or your steering wheel will be crooked about 30 degrees
9. IMPORTANT recommended is using a mallet and brass punch to tighten Spring Perch Lock Ring(C), Lower Lock Rings(D), and Black Lower Lock Ring(F). I used flathead and a hammer. Just put the tip of the screw driver in a notch on one of the top lock ring and hammer it till it tightens about 1/8" to a 1/4" of a turn. Remember you want to tighten parts (C) and (F) up to tighten and pard (D) down to tighten.


10. lower car, and enjoy part of your drop, repeat at all four corners.
11. Jack the rear up, put it on jack stands, Take out the old stuff. 2 -14mm up top and 1 – 17mm at the bottom.
12. Put in adjustment knob into coilover before installing the rears. Install the coilover tighten the top two bolts with 14mm deep socket.
13. For the rears I again measured from the top of the lock rings (C) and (D). I raised from 3” to 3-1/2”. Take measurements to match other side.

14. To install the lower bolt, it helps to raise the rear beam with a jack.
15. Repeat steps 6 and 7.
16. Once at the right ride height tighten bolts to specs.
17. Repeat step 9.
18. Do other side.
19. Double check bolts are tight, this include lugnuts.
20. Get an alignment in a couple days.
21. check again on bolts 1 week later, just to be safe.

I haven’t had any clicks or popping. With this preload setting it feels a little stiffer then stock on 50/50 settings most of the time, but you will feel bumps a lot more. When I did mine I drove around for a couple days and then you can see everything settle in a day or two. I had to raise mine up later because it was too low after settling. Some people twist the cylinder to raise it, I didn’t. Do it how you want, this was my way.

Before: too low barely any gap


After: your moms favorite 2 fingers gap
2011-07-03 20:26:06
#3
Thanks dude. That's very informative. I'm trying to with-hold judgement but these things are a huge time-suck esp. considering the performance they deliver.
2011-07-03 20:52:34
#4
Trust me I know, Im actually becomming a vendor for them to add to the store. But my next set will be bc racing
2011-07-03 21:02:15
#5
I honestly think the parts are broadly the same across many applications even w/in just the K-sport line. I.E. I have the same shocks and springs that the Civic/Integra crowd has on their K-sports. The top hats and lower mounts are the only parts that vary and only because of the spacing on the mounting bolts.

This all is done so that they can run large production runs and only do the absolute minimum customization to prepare batches for individual applications. Actual cost of production is probably well below $100 I would bet.

Also I hate the adjuster wrenches. I bent one already and they constantly slip so you gotta be very careful or you could really hurt your hands when they slip. Bad design.
Last edited by Benito Malito on 2011-07-03 at 21-20-40.
2011-07-04 04:05:24
#6
Good info. However, I will go BC-racing too...
2011-07-04 07:07:13
#7
Holy crap, flat head and a hammer is just asking to crack those things up !

Don't the k-sports come with a spanner to lock them off ?
2011-07-04 15:09:08
#8
Originally Posted by Cozzm0_AU
Holy crap, flat head and a hammer is just asking to crack those things up !

Don't the k-sports come with a spanner to lock them off ?


Yeah they come with two
2011-07-04 16:14:02
#9
Originally Posted by Cozzm0_AU
Holy crap, flat head and a hammer is just asking to crack those things up !

Don't the k-sports come with a spanner to lock them off ?


Originally Posted by duesmandella
Yeah they come with two


But they suck and its only a matter of time before I hurt myself with them.
2011-07-04 18:53:29
#10
Trade for w11 t25bb W/manifold and j pipe. N60 maf.
+ Reply To Thread
  • [Type to search users.]
  • Quick Reply
    Thread Information
    There are currently ? users browsing this thread. (? members & ? guests)
    StubUserName

    Back to top