


Disabling Front O2 Sensor
Are there any real side affects of disabling the Front O2 sensor? Calum does this on B13's already, but he has mentioned that B14's rely on it more.
I just got back from a test drive with O2 feedback disabled, and car seems to be driving pretty good, just shows up as in "Open Loop" all the time. The Map would need to be smoothed out a bit before it could be used safely for daily driving, but other then that it ran just fine.
Answer:
Set "E038 - Feedback Control Flags" to "D1"
 Originally Posted by dfddfd2
F1 => both enabled
D1 => O2 disabled
E1 => knock disabled
C1 => both disabled
Dave
Thanks dfddfd2!
Determining TP Scale
I've been reading some tuning guides to grasp how Nissan Tuning is done, here are the documents my question will follow the quote.
NisTune's Basic Tuning Guide and NisTune's Mapping Guide.
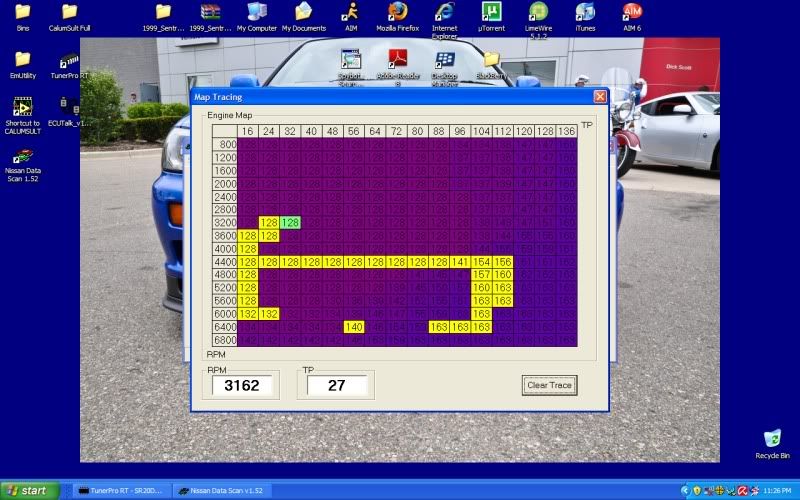
When I was out test driving, I set my TP to 100 from 69 (default DE+T one). I test drove the car, and it hit the final TP only when I really floored the car. This is great because that means I could possibly stay out of the boost map while simply daily driving.
With Nissan maps, if you roll over the map, it will keep on using the last column that it was on while still on the map. This is why you can get away with have 69TP as final column.
Now onto my question. If I say want my car to stay out of the last 3 columns unless I'm really flooring the car how would I go about the TP ranges?
For an instance, can I say do 0-30TP to be the way it is now, and then have the last 3 columns start with say 69-100TP?
Or would using the timing/fuel for 30 TP, be bad when in reality I would be at 50TP?
This is not for power reasons, you should be fine with leaving TP at 69 if your strictly looking for power, I'm just looking to stay out of the "gas hog" parts of the map unless I'm flooring the car.
Are there any real side affects of disabling the Front O2 sensor? Calum does this on B13's already, but he has mentioned that B14's rely on it more.
I just got back from a test drive with O2 feedback disabled, and car seems to be driving pretty good, just shows up as in "Open Loop" all the time. The Map would need to be smoothed out a bit before it could be used safely for daily driving, but other then that it ran just fine.
Answer:
Set "E038 - Feedback Control Flags" to "D1"
F1 => both enabled
D1 => O2 disabled
E1 => knock disabled
C1 => both disabled
Dave
Thanks dfddfd2!
Determining TP Scale
I've been reading some tuning guides to grasp how Nissan Tuning is done, here are the documents my question will follow the quote.
NisTune's Basic Tuning Guide and NisTune's Mapping Guide.
Important note: If you increase your boost and airflow makes the cursor hit the end of the fuel and timing maps,
then it is time to rescale the TP load scales to allow for extra measured airflow
then it is time to rescale the TP load scales to allow for extra measured airflow
When I was out test driving, I set my TP to 100 from 69 (default DE+T one). I test drove the car, and it hit the final TP only when I really floored the car. This is great because that means I could possibly stay out of the boost map while simply daily driving.
With Nissan maps, if you roll over the map, it will keep on using the last column that it was on while still on the map. This is why you can get away with have 69TP as final column.
Now onto my question. If I say want my car to stay out of the last 3 columns unless I'm really flooring the car how would I go about the TP ranges?
For an instance, can I say do 0-30TP to be the way it is now, and then have the last 3 columns start with say 69-100TP?
Or would using the timing/fuel for 30 TP, be bad when in reality I would be at 50TP?
This is not for power reasons, you should be fine with leaving TP at 69 if your strictly looking for power, I'm just looking to stay out of the "gas hog" parts of the map unless I'm flooring the car.
 Be the first to like this post.


")


