


Well tonight I tackled an inner axle boot that had ripped on me not to long ago, I like to fix things before they become worse. Here is how I did it and what I used to do, hope you guys enjoy.
Tools of the trade and boot kit I used:

PartsTrain.com - Hard to Find Auto Parts and Truck Parts -
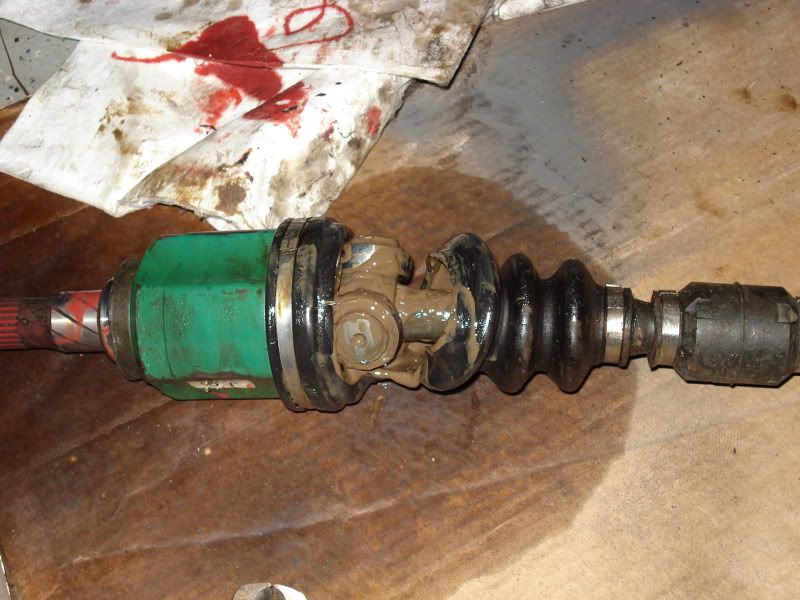
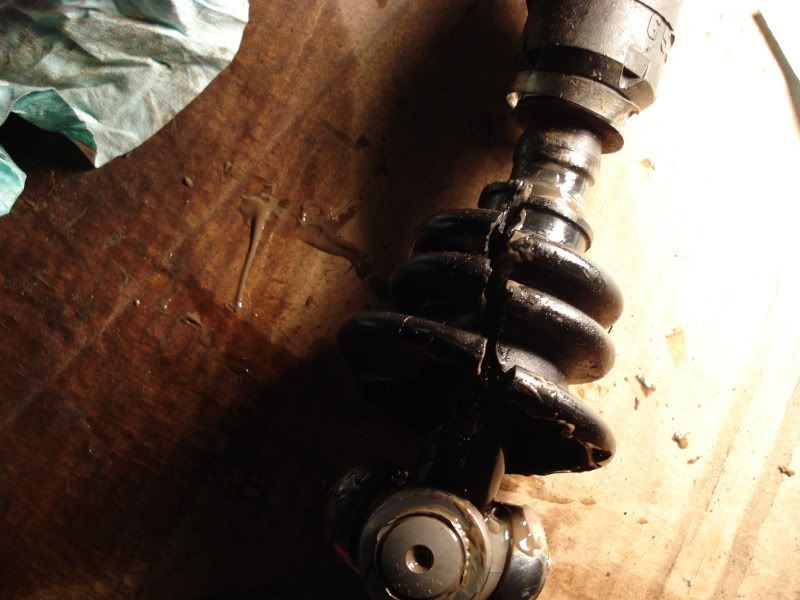
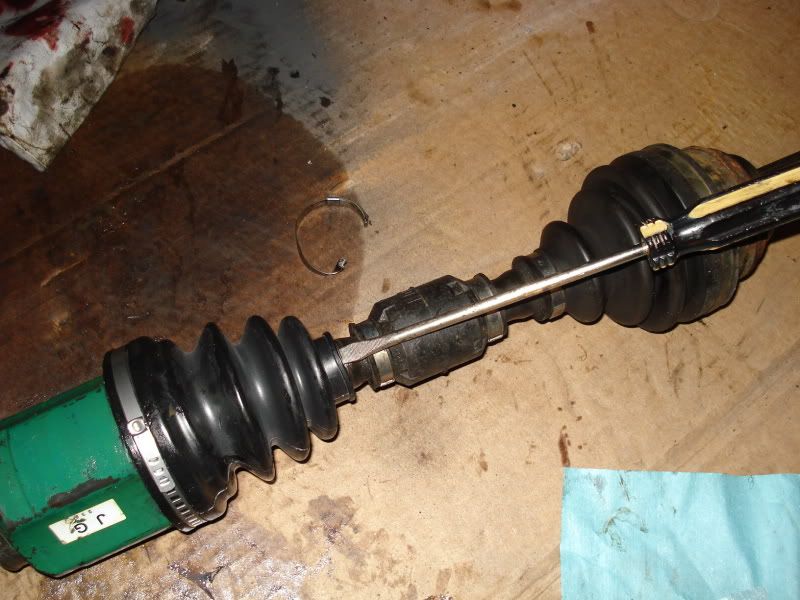
1. Here is the axle boot after taking the axle out of the trans. (I didnt document taking the axle because if you dont know how to do that read on here how)
2. I cut the old axle boot to disconnect the parts of the axle to make it a little easier to work with.
3. I then cut the clamp that holds the rubber boot on both sides to protect the joint. I used the dikes to get them, it takes a little time and dont worry about messing up the boot or clamp because you wont be using them again.
4. Now you have the clamps off you can slide the boot off or just cut it whatever one you prefer. I chose to cut it
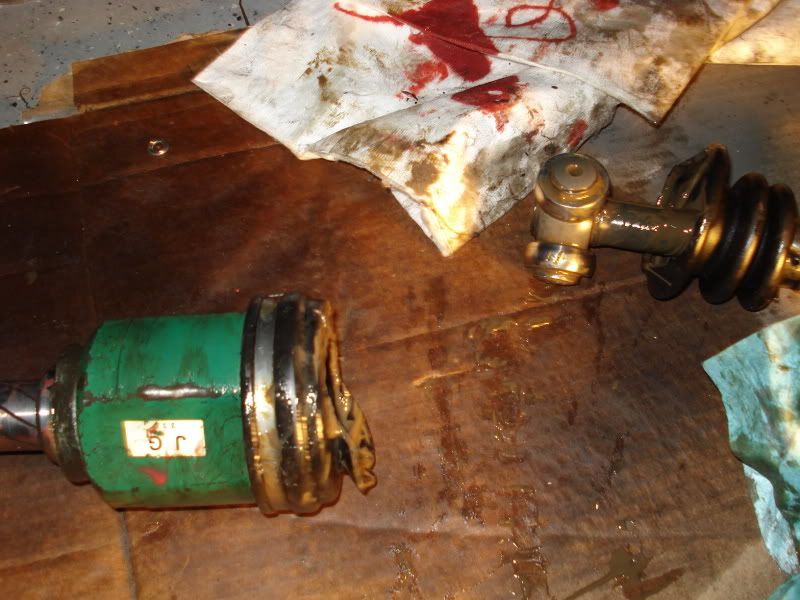
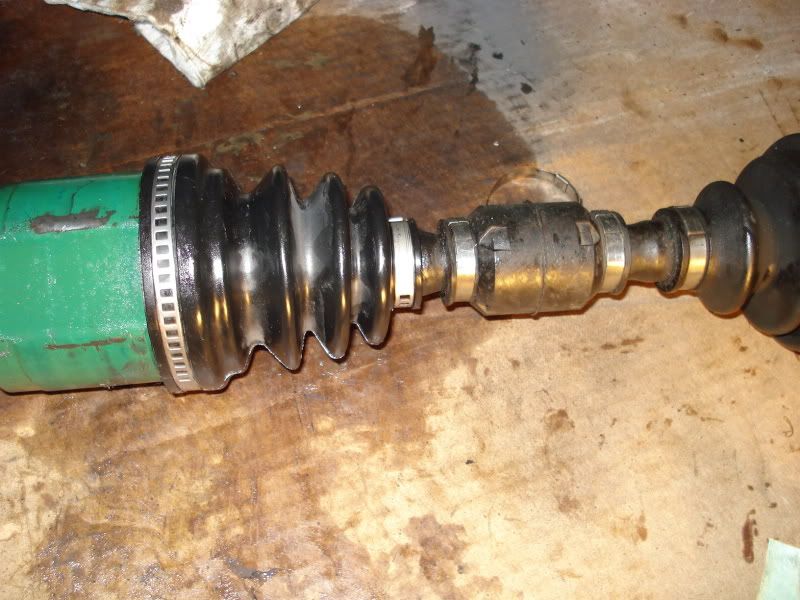
5. Here is what you now have in front of you
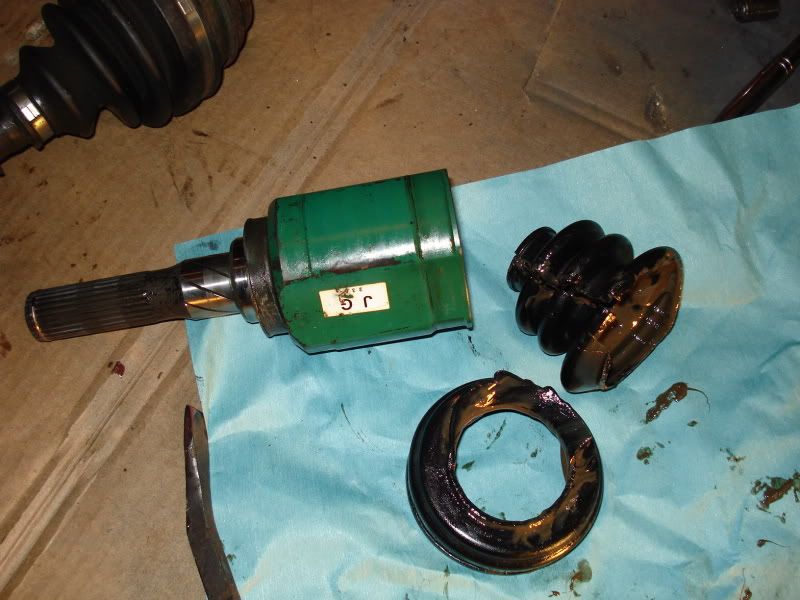

6. Clean up all of the grase if possible(do not use brake cleaner there is no need and its easier with the towels to just wipe it away. It doesnt have to be squeaky clean but make sure you get most of it.
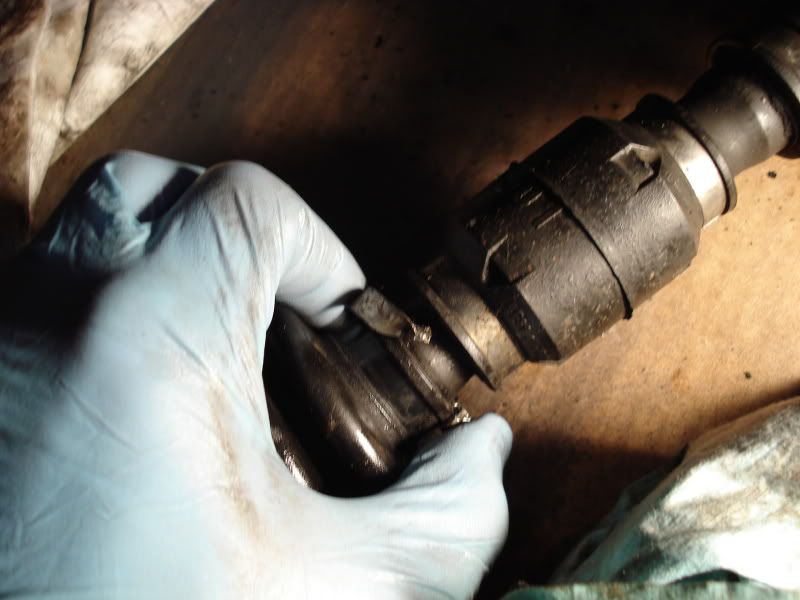
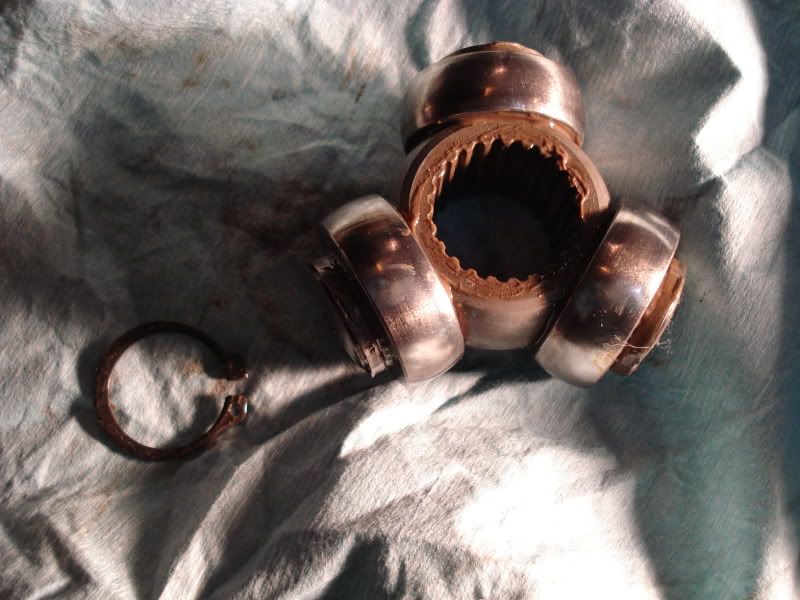
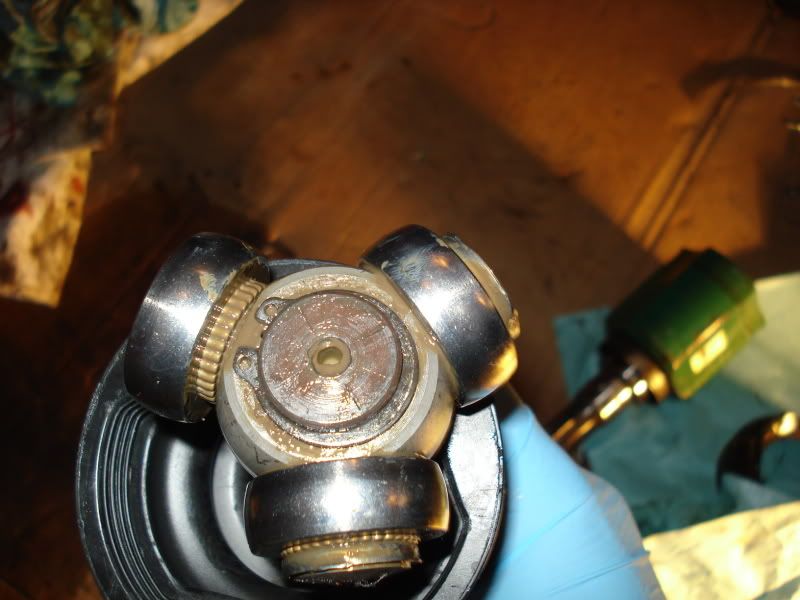
7. Now you are ready for the new boot bust first you have to take off the triangular balls that are on the end of the one piece of axle. Here you clearly see the snap ring that is on the end that needs to be removed.

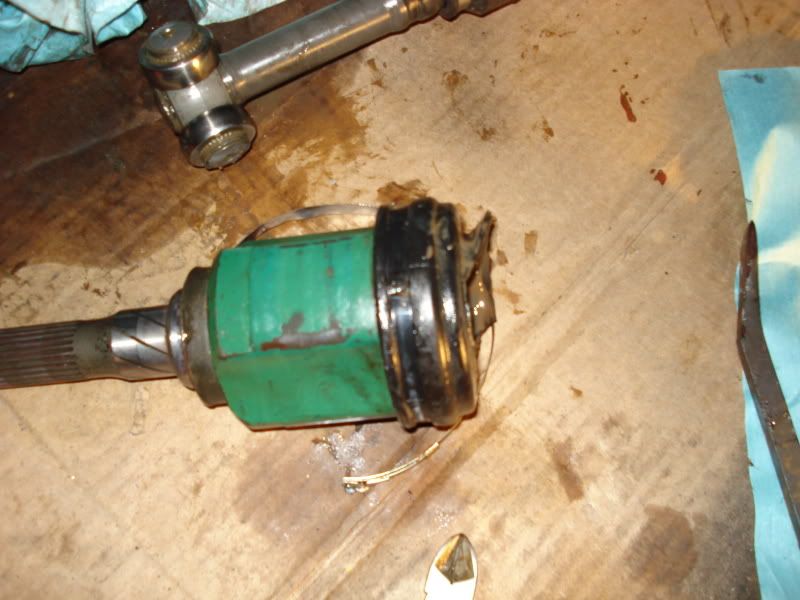
8.Now after taking the snap ring off you end up with this after taking it apart

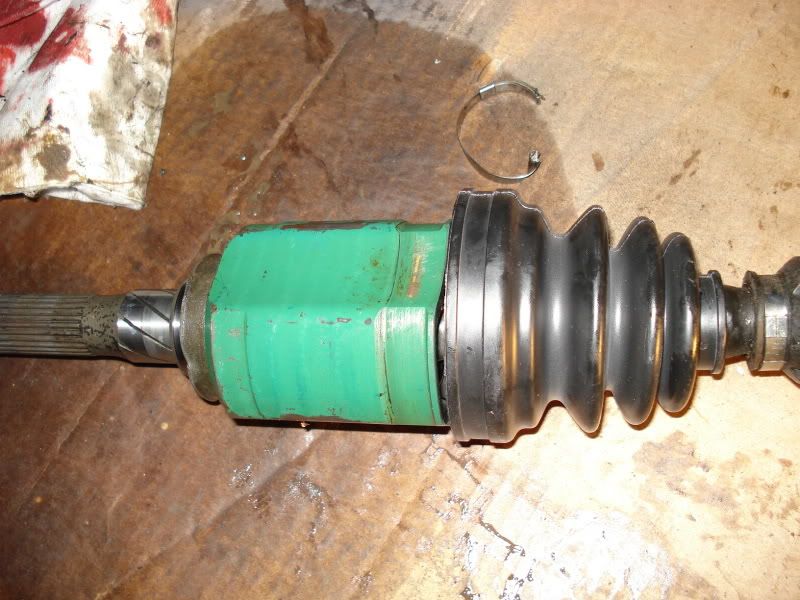
9. Now you are ready for the new boot to go on, slide the new boot onto the axle like so.
10.You have put the new boot on now its time to put the triangular joint back on, the kit comes with a new clip so use that one
11. This just gives you an idea on how the other side of the axle slides into the boot.
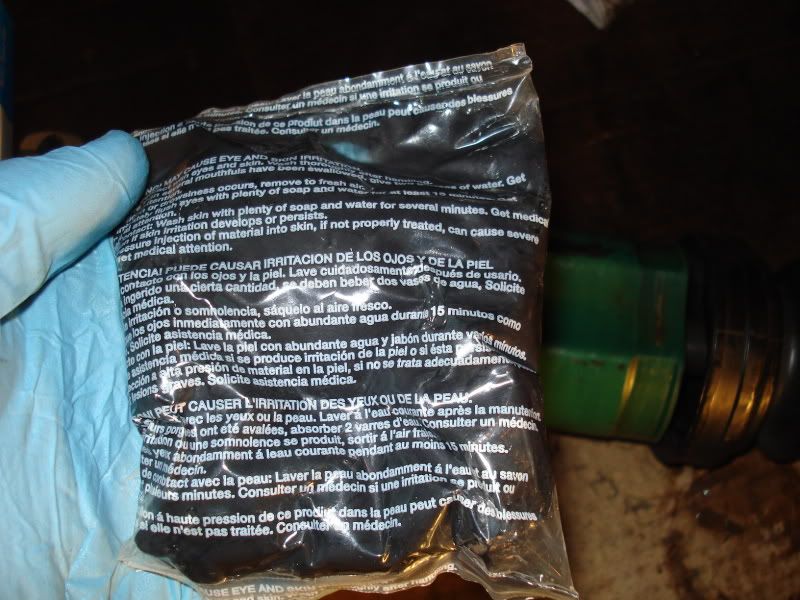
12. All of that grease you cleaned out needs to be replaced so you take the supplied grease cut off a corner of the bag and begin to fill up the boot and all of the other parts. Try to be as neat as possible with this, don't want to get this stuff all over the place.
13.Now its time to clamp the boot on and you are almost done. First do the larger side, the clamps that come with the kit are very easy to work with. You have to pull the clamp as tight as possible by hand till it catches on the 2 teeth that are on the bottom that slide into the holes. Its important to make it tight because you only get a so much adjustment when you clamp it. If you somehow don't make it tight enough don't panic because you can pry it back open and try again until you get the desired tightness.
14. To finish it up you must use a screwdriver and pry the smaller side up a little and work the air out. It helps with boot life in the long run so you dont have to change them all the time. Just slowly work the air out and you will hear it coming out of the boot.
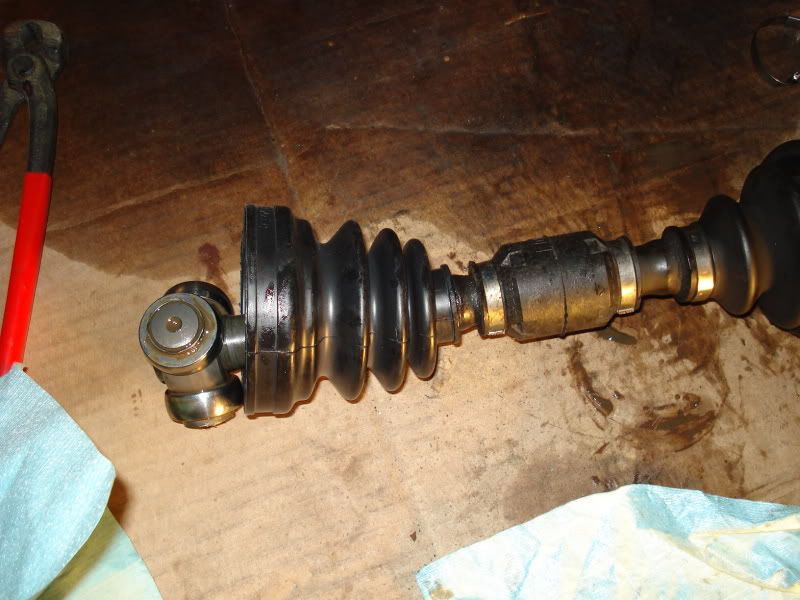
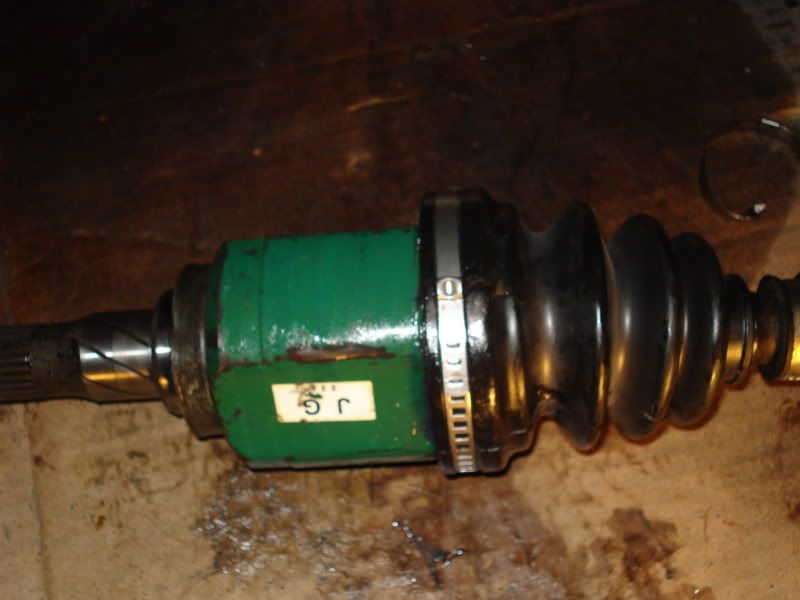
15. Final step is to do the last clamp on the small side, I noticed that this clmap was a little longer than I really needed so I trimmed it down some to make it easier to work with. Here is the final product, take note where the boot is positioned on the axle.
Overall Impression: This wasn't that hard if you have the correct tools and take your time. I would give this a 6 out of 10 on the difficulty scale. The hardest part is getting the damn axle in and out as always they never want to cooperate.
Tools of the trade and boot kit I used:
PartsTrain.com - Hard to Find Auto Parts and Truck Parts -
1. Here is the axle boot after taking the axle out of the trans. (I didnt document taking the axle because if you dont know how to do that read on here how)
2. I cut the old axle boot to disconnect the parts of the axle to make it a little easier to work with.
3. I then cut the clamp that holds the rubber boot on both sides to protect the joint. I used the dikes to get them, it takes a little time and dont worry about messing up the boot or clamp because you wont be using them again.
4. Now you have the clamps off you can slide the boot off or just cut it whatever one you prefer. I chose to cut it
5. Here is what you now have in front of you
6. Clean up all of the grase if possible(do not use brake cleaner there is no need and its easier with the towels to just wipe it away. It doesnt have to be squeaky clean but make sure you get most of it.
7. Now you are ready for the new boot bust first you have to take off the triangular balls that are on the end of the one piece of axle. Here you clearly see the snap ring that is on the end that needs to be removed.
8.Now after taking the snap ring off you end up with this after taking it apart
9. Now you are ready for the new boot to go on, slide the new boot onto the axle like so.
10.You have put the new boot on now its time to put the triangular joint back on, the kit comes with a new clip so use that one
11. This just gives you an idea on how the other side of the axle slides into the boot.
12. All of that grease you cleaned out needs to be replaced so you take the supplied grease cut off a corner of the bag and begin to fill up the boot and all of the other parts. Try to be as neat as possible with this, don't want to get this stuff all over the place.
13.Now its time to clamp the boot on and you are almost done. First do the larger side, the clamps that come with the kit are very easy to work with. You have to pull the clamp as tight as possible by hand till it catches on the 2 teeth that are on the bottom that slide into the holes. Its important to make it tight because you only get a so much adjustment when you clamp it. If you somehow don't make it tight enough don't panic because you can pry it back open and try again until you get the desired tightness.
14. To finish it up you must use a screwdriver and pry the smaller side up a little and work the air out. It helps with boot life in the long run so you dont have to change them all the time. Just slowly work the air out and you will hear it coming out of the boot.
15. Final step is to do the last clamp on the small side, I noticed that this clmap was a little longer than I really needed so I trimmed it down some to make it easier to work with. Here is the final product, take note where the boot is positioned on the axle.
Overall Impression: This wasn't that hard if you have the correct tools and take your time. I would give this a 6 out of 10 on the difficulty scale. The hardest part is getting the damn axle in and out as always they never want to cooperate.
 Be the first to like this post.


